


 and I hope she has a lovely birthday with all her family and loved ones spoiling her. Thanks for stopping by today. As always any comments will be very appreciated.


 It also shows the Promarkers ready for colouring the images. Have you tried Promarkers (or Copics)? They are alcohol inks in marker form and are wonderful. The colours are kind of transparent and so it is possible to build up beautiful shading by overlaying one colour on top of another. (see the toadstool caps for a good example of that). So I started colouring, and as I am hoping this will become a class, I wanted to make it clear and easy for participants to see just which bits to colour in and cut out for each layer of the decoupage. Hence picture 3 shows all seven layers and the complete image coloured. It is certainly good brain exercise as well as a craft project!! Having coloured in all the layers, cut out all the layers and mounted them one on top of the other you are ready to choose some yummy background paper and toning/contrasting cardstock to create the finished card. Do you recognise the style of card Ali? Thanks for a geat idea. I love it. Right that's me done for this afternoon. Thanks for your regular visits even though there has been nothing to look at for quite some time. Thanks for looking today and I hope you enjoyed your visit.


 . Hence I am only just getting round to posting for the first time in what seems like forever. I know you will be pleased Ali. We had a great time when she was down (from Katikati) and we crafted 'til late. The weather was great (if a little cool for her being from the winterless north) and we had a couple of lovely long walks. I have been busy experimenting and have a craft post to show you so I'll sign off here and see you in a couple of ticks with that post.

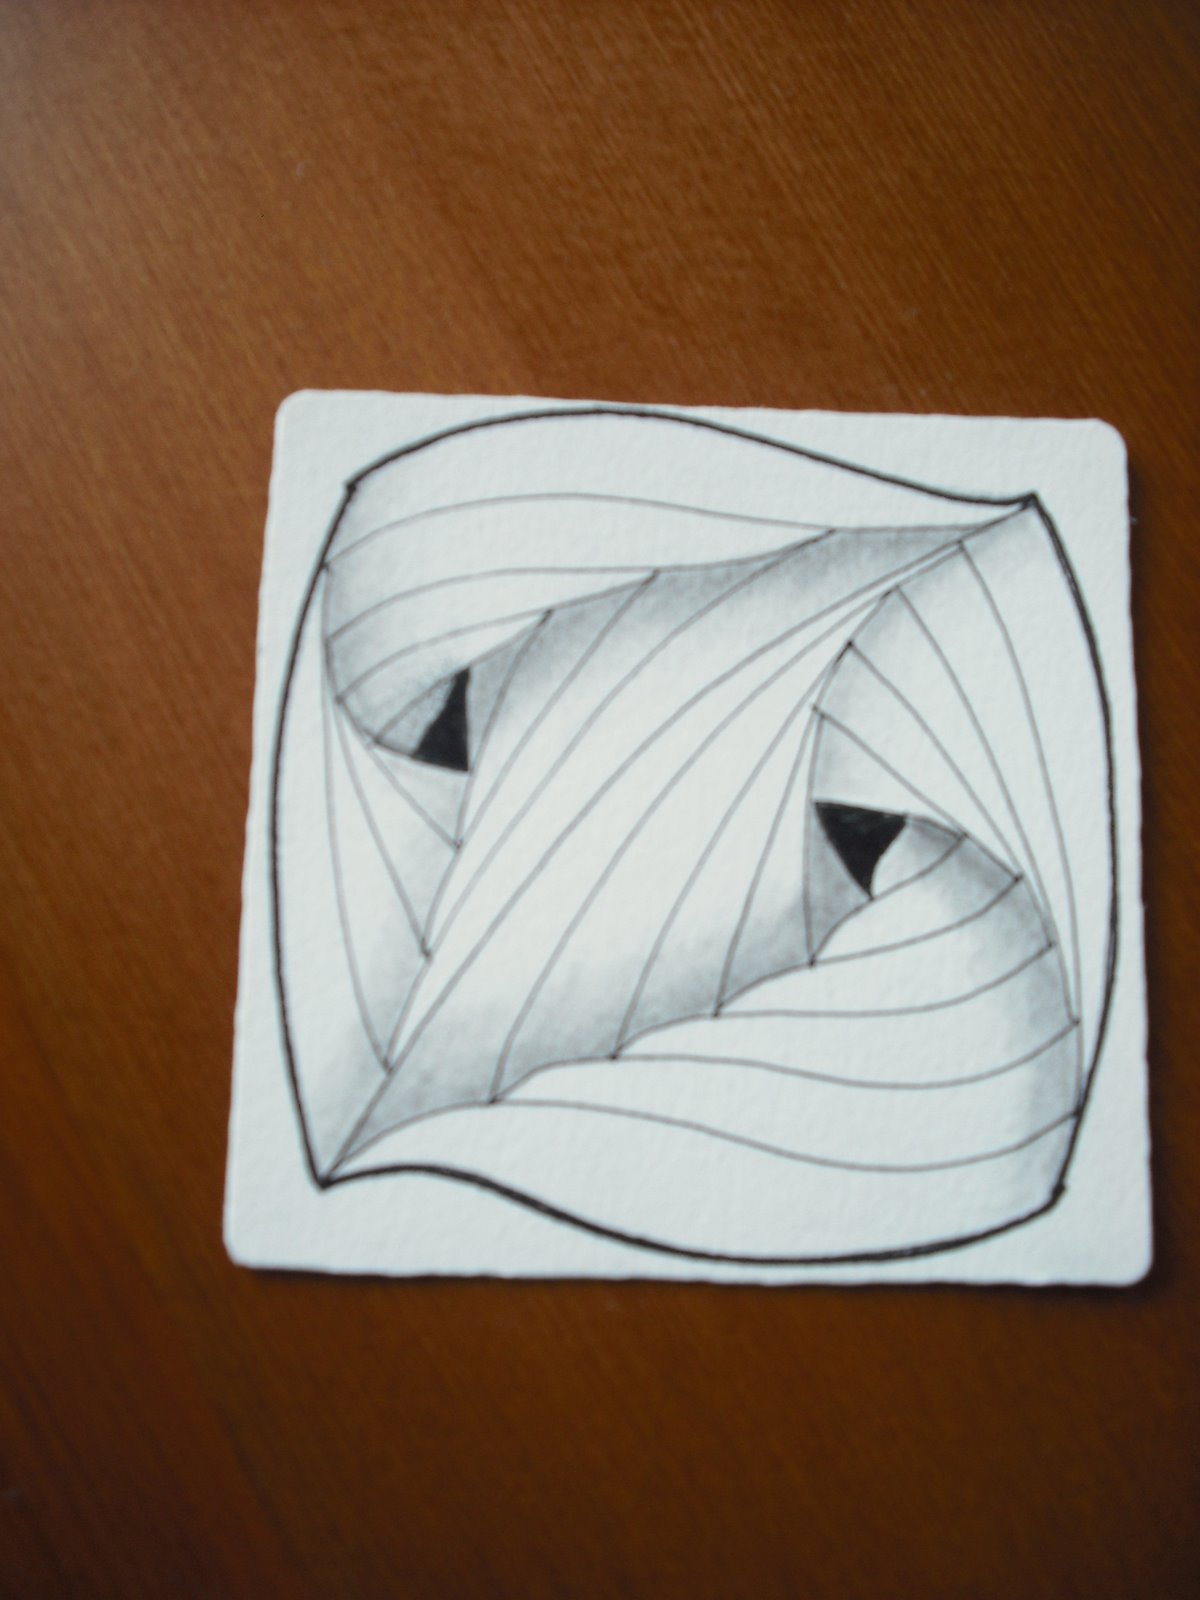 The other two tiles incorporated a stamped leaf image which was my starting point in each case. I then drew my frame around the leaf, divided it up into sections and was then ready to Zentangle. As I am only a beginner I need to look to others for pattern inspiration. I have a couple of little booklets with different sample patterns in and the web of course. It takes a while to decide which pattern to try in the sections. I didn't want my leaf image to be overwhelmed by the Zentangle patterns, which after all are supposed to be the background. I think I have succeeded by and large. They did take a good while to do but I really enjoyed doing them. The pattern on the right side of the first leaf tile was my own idea and the swirly pattern at the bottom of the second leaf tile was my own idea too so I feel pleased with myself for coming up with those. Such amazing patterns and designs on the web. Maybe one day I'll measure up to some of those. See you next time and thanks for looking today.


 Hello Everyone. Remember a couple of weeks ago I showed you the tags I have been making for our eldest Granddaughter? She is on a journey to loose weight and get fit in readiness for a big adventure of going to Aussie for a while to see if she would like to live there permanently. Since she started her regime I have sent her an inspirational quote (on FaceBook) EVERYDAY to help keep her focused and encouraged. She is doing so well and has lost nearly 9kgs since early January and looks forward to her little quote every morning. Lots of her friends have been tuning in too to see what pearl of wisdom G'ma has today, which I think is pretty cool. Anyway todays post is all the tags to date and the little book I have made to house them so that she can take them with her, when she goes, and refer to them any time she likes. She doesn't know that I'm doing this and just said to me yesterday (she is staying with us for a few days) I must write down my sayings in a wee book so that I will always have them. Tee hee I thought to myself!! The book of pockets was a class I learned at Sister Act (best craft shop in the Lower North Island of NZ)
 . I made one at the class but never filled it with tags. I also bought another kitset and this is the one I have made up for Ashleigh. It turned out SO much better than the one I did in class and I am thrilled with it. More importantly I know that Ashleigh will be thrilled with it. I have a lump in my throat now typng this so imagine how I am going to be at the airport!!! Thanks for visiting today.


 Hi Everyone and I hope your weekend has got of to a good start. Yeah it's a Long Weekend here in NZ so make sure you really enjoy it ,those of you who go out to work. I have been doing lots of experimenting this week to try to find the best card to use for a project/class coming up soon. I've not had a lot of success I have to say and I am off into Wellington AGAIN today to look at yet another type of coated cardstock which I REALLY hope will be the answer. In the meantime I had to make yet ANOTHER Never Ending Card because when I wrote the class instructions I couldn't find the photo of the finished article to put in. The original is up at the shop for customers to see so I had no option!!! I think I probably like this one better and I think this is the paper/card we will be using in the class. One thing is for certain - I am VERY familiar with the technique!!!- which is always good in the class situation. Right! Harold is ready now so we are off into the Big Smoke. This will be the 4th time this year and we're only just into February. Usually about 4 times a YEAR would be my total. Enjoy the weekend and thanks for calling in today.


